Ellie x Boudreaux boys 5.5 weeks
Ellie x Boudreaux girls 5.5 weeks
Ellie x Boudreaux 8 - 10 weeks
Ellie x Boudreaux: Junior and Sassy
|
This page describes the steps to putting the ears up with your prepared supports. |
|
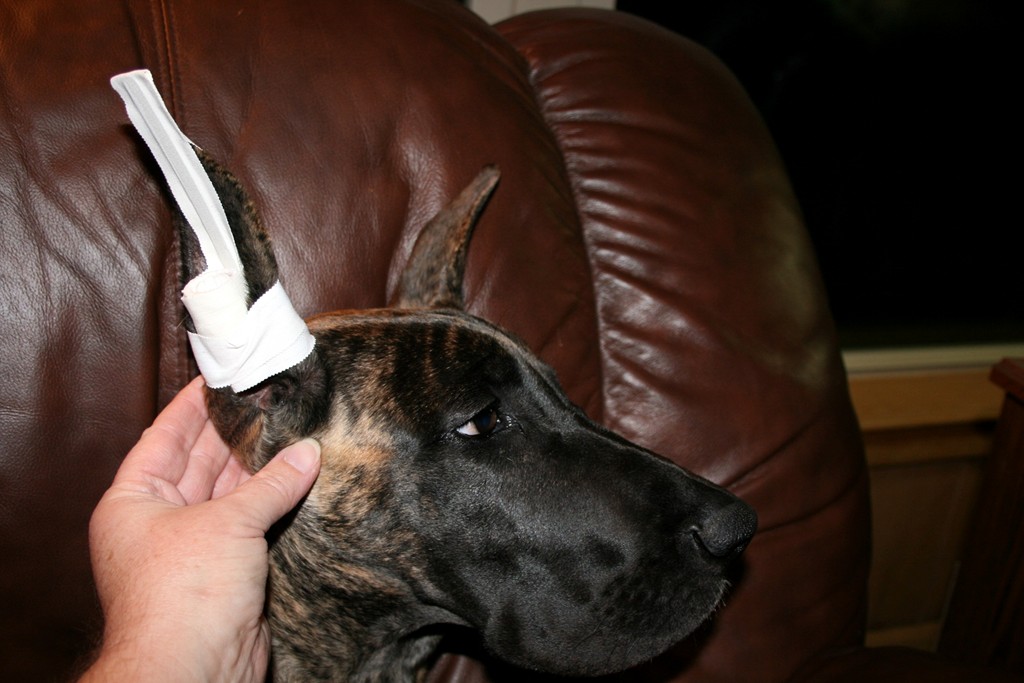 |
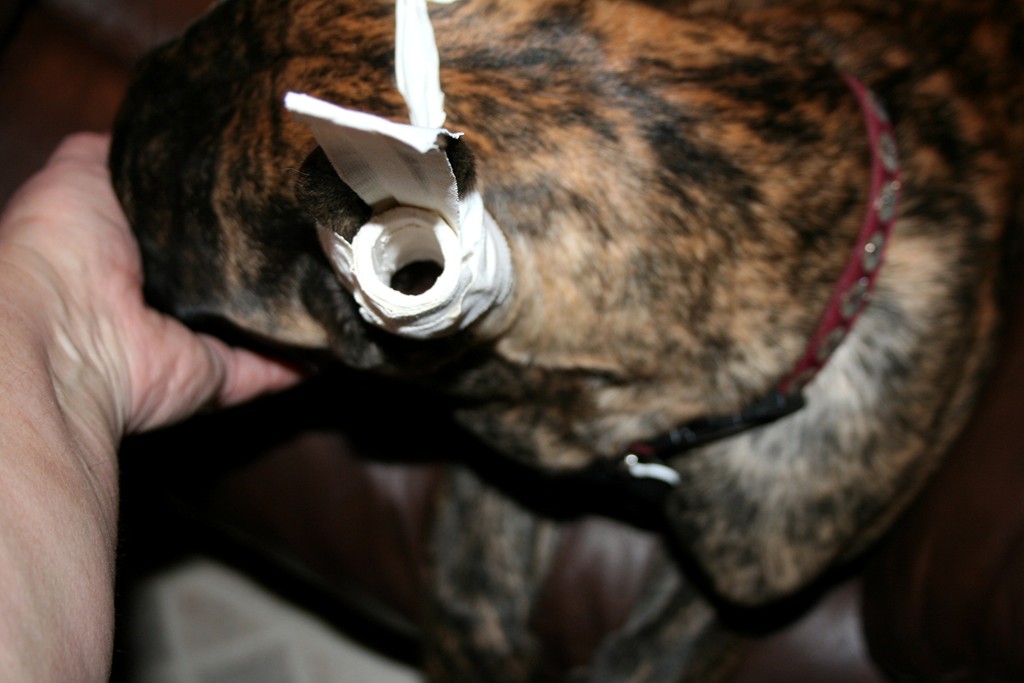
Step 6 - place support in the ear If you have not done so already, clean the inside of each ear with alcohol and let dry. Place one of the prepared ear supports in the ear with the base of the roller and the stay RESTING on the knob in the ear. (There is a photo of the knob on the "Ear Taping - Preparation" page). The base should be touching the knob but not pressing down hard. Gently press the support against the ear, and GENTLY stretch the ear upward as you press the length of the stay up the ear past the tip. Lay the long end of the tape over the tip of the ear and down the back, and gently press into place. NOTE: Be sure the ear tip is not bent, and that the stay extends a little past the tip of the ear. Take one of the shorter pieces of tape and wrap it around and slightly under the base of the ear and around the base of the support. The tape should come from the front of the ear toward the center of the head, then around the back. For the puppy's right ear as in the photo, you will be wrapping counter clockwise. You will be wrapping clockwise for the puppy's left ear. There is a natural fold on the front side of the ear, be sure that is laying down normally. NOTE: DO NOT PUT PRESSURE ON THE TAPE WHILE WRAPPING THE EAR!! Just lay the tape on the ear. After it is in place to your satisfaction, gently squeeze the ear with your hand to press the tape into place. |
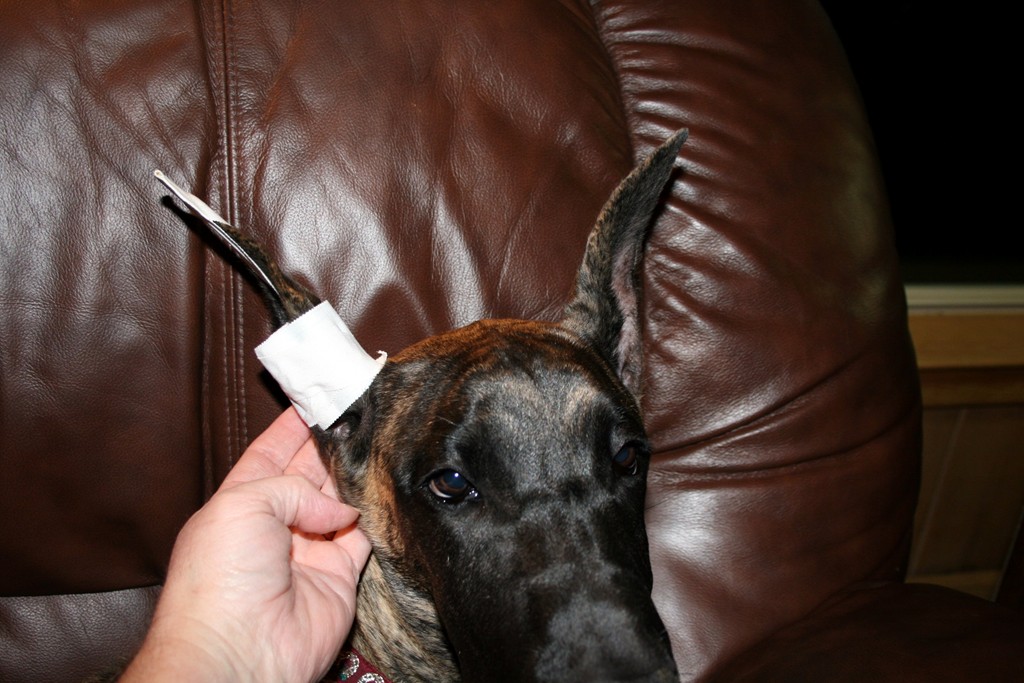
| Second piece of tape The second piece of tape is wrapped in the same direction as the first, but goes a little higher on the roller. Don't worry if there is a gap on the back of the ear between the two pieces of tape. Again, just LAY the tape on the ear. When it is positioned to your satisfaction, gently press into place. |
 |
 |
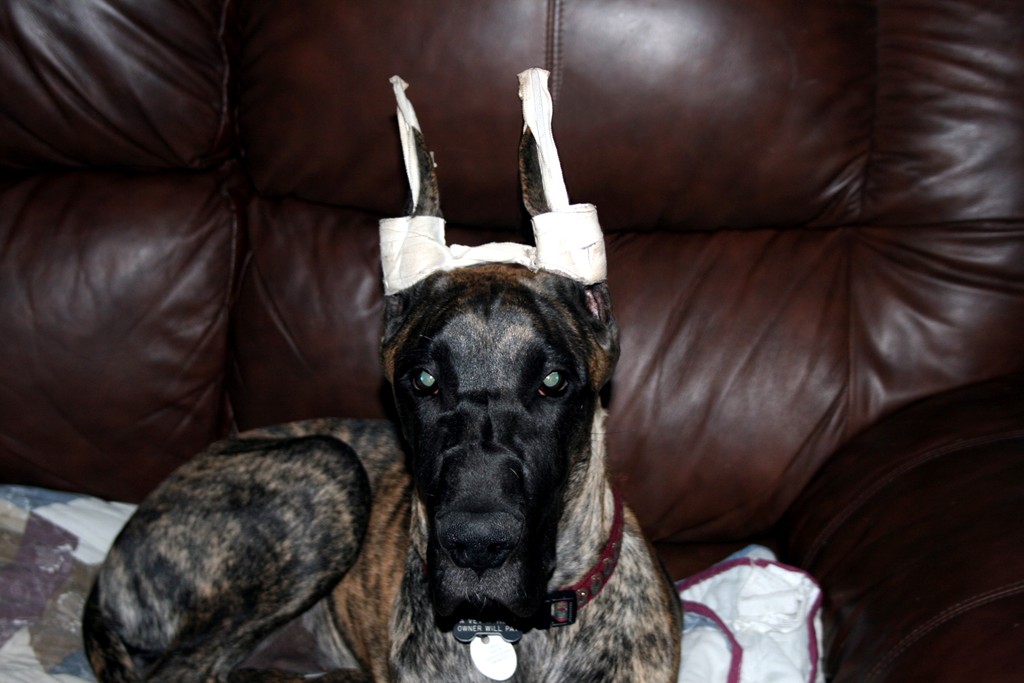
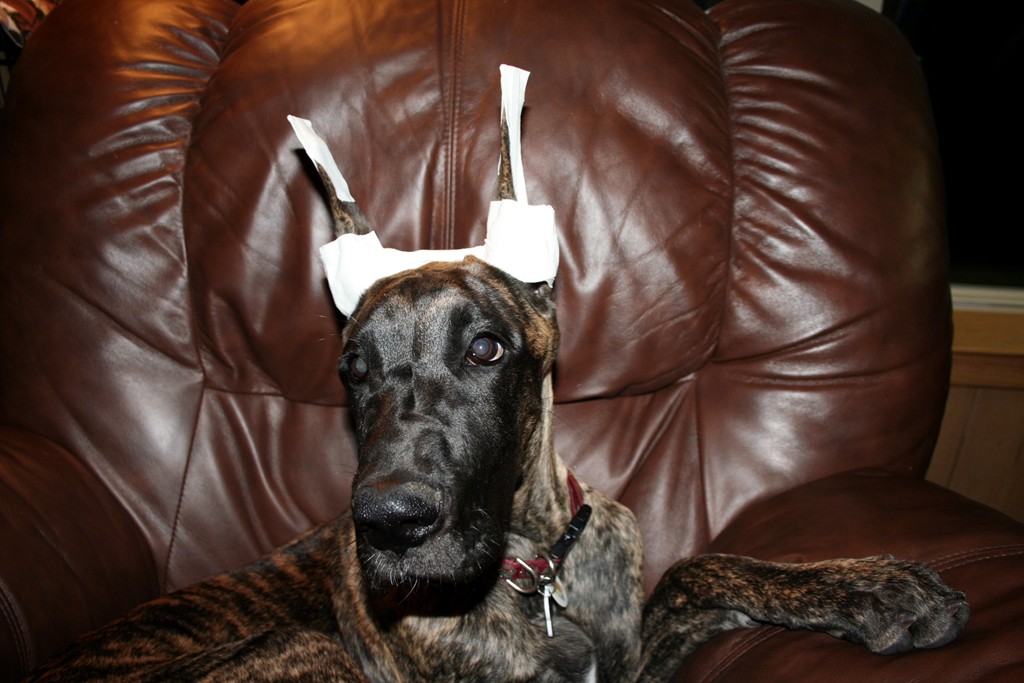
Repeat with the second ear This is a view of the back of the ears. This also demonstrates why a bridge - a section of tape between the ears used to help hold them up - is usually needed. If you continue having to tape your dog's ears until he is nearly an adult, his muscles will get strong enough to hold the ears up even with the supports in place. But puppies need a bridge. Each time you put the ears up you will know right away if your puppy still needs a bridge or not. If in doubt, put one on. You'll notice that Dakota has barely woken up while I've been wrapping her ears! |
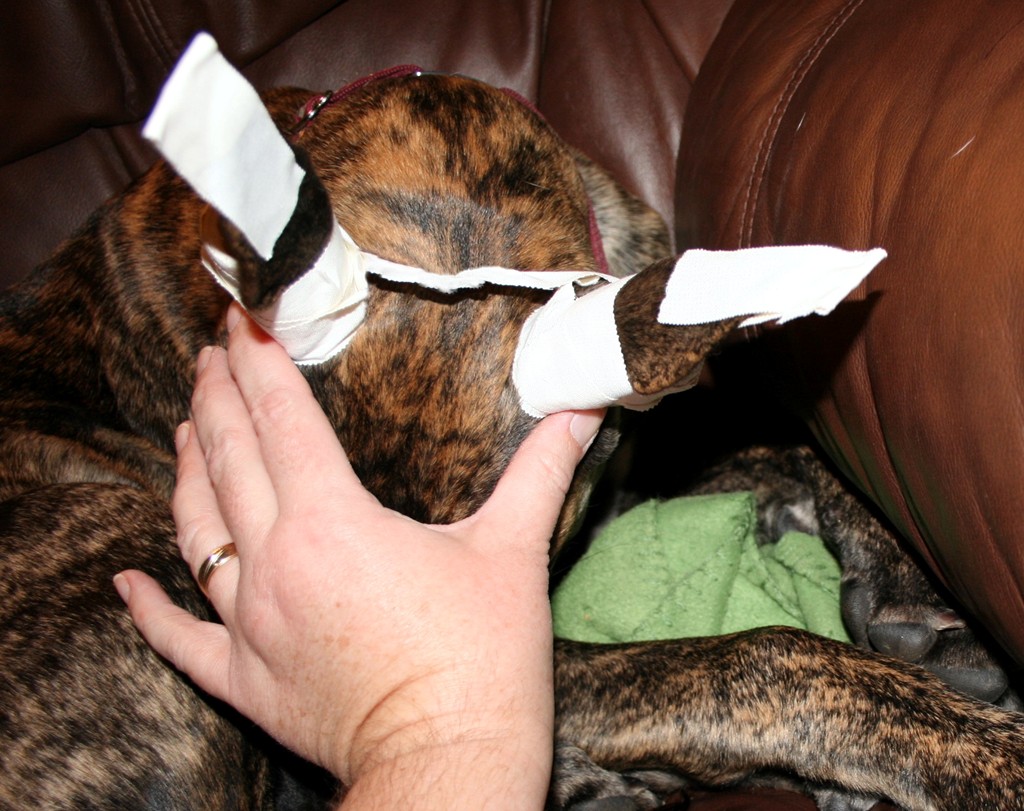
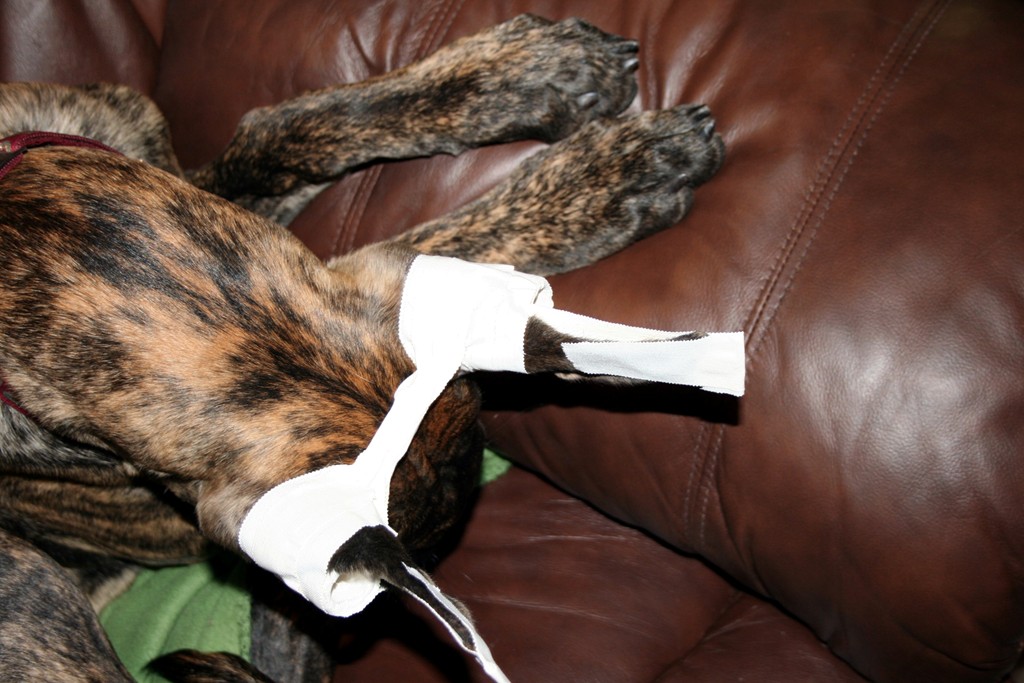
| Step 7 - the Bridge Position the puppy's head so it is straight, and the ears are upright or in a slight V with the backs of the ears facing inwards. Take one of the longer pieces of tape, and lay it LOOSELY across the top of the puppy's head behind the ears. Wrap the ends around the base of each ear. The ends may be long enough to continue across toward the other ear, that is fine. Take the second long piece and lay it in front of the ears. Place one end around one ear. Continue across that ear, and along the tape stretching between the ears (sticky side to sticky side) and around the other ear. As you are placing this second piece of tape, press down as needed to hold the ears in the desired position. The photo shows the first piece of tape in place, before I have put on the second piece. My hand is over Dakota's face to hold her head down so you can see the top view. Putting on a bridge takes some practice - if you are not satisfied with it, you don't have to take the whole ear down. Just cut the bridge away and re-do it. |
 |
 |
Step 8 - Observe! The last step is to watch the pup carefully for a while. She should seem quite comfortable with her ears up - maybe a few shakes of the head and she'll be fine. If she seems uncomfortable, scratching at the ear supports a lot or constantly shaking her head, then something is wrong. If you suspect that there is a problem, take the ears down IMMEDIATELY. The sooner the better - if you take them down before the glue sets it will be a LOT easier. But if the glue has set, then just use a lot of Uni-solve (adhesive remover). The most common reason for discomfort is either tape wrapped too tightly around the ear, or the base of the roller and stay pressing too hard on the knob of the ear. Both of these things should be fixed immediately, or at the best your puppy will get a sore place on their ear which is not only uncomfortable for the pup, but will make your future taping a little trickier until it heals. And at the WORST, too-tight tape can cut off the circulation and part of the ear can actually die and fall off! You also will be watching to see that the ears are positioned the way you want them to be. They should be upright, either parallel or in a slight V. The ears should be facing outward, with the backs of the ears facing inward, toward each other. Remember that the cartilage will harden in the position you put them in! So be sure you are happy with it, and they look exactly the way you want. If you have any doubts, send a photo or take the pup to the breeder or another experienced person so they can evaluate the ears. If the ears look good and the puppy is comfortable, you're all done! Throughout this process, at every opportunity I give the pup a little treat. And lots of praise!! Ear taping should not be traumatic or uncomfortable. It is just another grooming task that you can teach the dog to tolerate calmly. Like nail trimming, tooth brushing, etc - it takes a little training and patience, and a LOT of praise and treats! |
| Back view View of the finished product from the back. |
 |
 |
Closer view One of the main reasons I like this ear taping method is that it allows good air circulation into the ear canal. This means that if everything stays in place you can leave the ears up for a whole week with no worries about causing an ear infection. This ear support method is also very flexible - if the puppy is sleeping in her crate and her ears stick out through the bars it won't hurt her at all. |
| Great air circulation Top view. |
 |
|
|
Time to take the ears down! Be sure to check the pup's ears EVERY DAY. Look for any signs of abrasion or soreness at the edges of the tape. Look for signs that the supports are coming loose, or that the pup is simply outgrowing the supports. Hopefully your puppy's ears will stay up for a whole week. 5 or 6 days is probably average, but longer is fine as long as everything is comfortable and not coming loose. NOTE: leaving the ears up for a whole week is ONLY OK if the ear has good air circulation. If you are using a taping method where the base of the support fits down into the ear canal, the ears need to air out a little more often. Usually the first sign of trouble is one ear starting to tip inward. This photo of Dakota was taken a few weeks before the other photos here, you can see that her left ear is tipping inward. It is subtle, but once it starts it gets worse. This happens when the roller and/or the stay start to slide up off the knob in the ear. If they are too high, the ear loses support and will fall inward. If you notice this happening, sometimes you can push the base back down on the knob and secure in place with more tape. This will only buy you a little time however - you'll need to take the ears down within 12 hours or so. Don't leave the ears tipping inward - this can break down the cartilage at the base of the ear and can be a terrible problem. |
|
Taking the ears down This photo of Dakota was taken when she was about 12 weeks old, and you can see that in this case her right ear is coming loose. To take the ears down, you will need scissors (preferably bandage scissors) and a good gentle adhesive remover like Uni-solve. Use as much adhesive remover as you need, and start with the tape that goes over the tip of the ear and down the back. Wipe up from the end, and the tape should just roll up. Keep rolling it up until the ear tip is completely free. Repeat with the other ear, I like to be sure both tips are free before I remove anything else. Then cut the tape at the base of the ear up the back side. You can cut the bridge at this time too. Continue to wipe with the adhesive remover from the cut edges of the tape and along the edges of the stay. Don't pull - let the adhesive remover doH the work. Once all the supports and tape are off the ears, clean the ears and examine them for any signs of soreness or abrasions. If there are any sore places, you'll need to protect them when you put the ears back up with a TINY bit of padding or by avoiding those areas by the use of a different sized roller. Remove the excess tape from the stays and rollers, and put them in a safe place - dogs like to chew on them! How long to leave them down? That depends - if the puppy is still very young (less than 9 weeks) it's fine to leave them down for a day or so. The ear cartilage doesn't really start to harden until about 12 weeks. So especially if the puppy has a sore place on the ear, you can treat it and let it heal for a day or two. Ears usually heal very quickly if they do get an abrasion. And of course, if you do see a sore place on the ear, you need to figure out how to protect it by either padding it, or wrapping the ear in such a way that it doesn't cover the sore. As the puppy gets older, you will want to put the ears back up pretty quickly. Every day you leave them down will add to the amount of time it will take to get them to stand. And since this method allows great air circulation you don't need to worry about letting the ear canal dry out or air out. As you progress, the ears will be standing for a few hours when you first take the supports off. If by the next day they are still standing and look PERFECT, you can wait to put the supports back on. Watch the ears closely - once the tips start to soften and droop a bit* it is time to put them back up. Sometimes when a puppy is teething the ears will seem to get worse and not stand as well as they were a few weeks earlier. Don't worry, this is normal. When the ears are starting to stand on their own it can be really tempting to leave the ears down to "see what they'll do". But don't do it - you will regret it later! Eventually, the happy day will come when you take them down, they look great and stay that way! *Sometimes, especially with a very long crop, the bases of the ears will be nice and solid and the dog is holding them up perfectly LONG before the very tips are strong. There isn't anything wrong with continuing to tape the entire ear until the tips are solid. But sometimes you can support just the tips - there are many methods for this including using Breathe-Rite strips, or just wrapping the tips with some tape. You can experiment and see what works for your dog. |
 |